Saturday, October 4, 2014

4 Months?!?! An update + an apology.

Guys. Can we just talk about how I suck at blogging? I'm embarrassed. I'm ashamed. It's been almost FOUR months since my last post. I'm not going to waste time with excuses. I'm just going to apologize. I am truly sorry for my absence. For those that still continue to check my blog, THANK YOU. Even though I haven't been posting, I still check the site traffic here from time to time. It warms my heart to see people still coming to this blog daily.

So, now that I'm back, let's talk. A few things are going to change on this blog.

First, I cancelled my Julep subscription. (I almost have a post ready that discusses that in detail.)Although you'll still see older Julep polishes used for nail art and occasional swatches, no new Julep collections will make the cut. And of course, no new unboxing’s or reviews on Julep products.

The second change I plan to make is to incorporate more personal posts. That was my intention all along, but I fell short and stopped blogging before I made one.

Next, I really want to bring in beauty products of all kinds. I LOVE nail polish, but there are so many other products I use and love on a regular basis.

And last but not least, I'm going to (finally) incorporate the pups! After all, the blog is called PUPS & Polish.

So there you have it. Hopefully those of you that stuck with me will continue to do so. And again, I am so thankful for the readers that haven't left me. (I'm also working on replying to your emails!) And for the readers that have forgotten about P&P, well, I can’t blame you! I hope you’ll come back!

signature


Thursday, June 19, 2014

Floral Mani with White+Mint Stripes!

Hey guys! I’m back with another nail art design. It was a bit time consuming, but I loved the way it turned out. Sadly, I can’t take credit for this design. There are hundreds of variations of this design, so if you’re interested in recreating it, you’ll have plenty of inspiration! And as always, you can create this look with any colors or brand.

IMG_4877

Here are the products I used!

IMG_4875

1. Rock Hard Nail Hardener Base Coat
2. Nail Striping Tape
3. Julep Ramona
4. Julep Maddy
5. Revlon Minted
6. OPI Jade is the new black
7. Julep Brigitte
8. Seche Vite Dry Fast Top Coat


Here are the steps I used to create this look, as well as a close up.

1. I started with a thin coat of my base coat.
2. I applied two coats of Revlon Minted.
3. After it was completely dry, I applied nail striping tape to my pinkie to create vertical stripes. I painted a thin layer of white polish and quickly removed the tape. I repeated this on the rest of my nails, with the exception of my ring finger.
4. While the stripes were drying, I then used a dotting tool on my ring finger to create a pink blob flower.
5. I used a thin nail brush to gently add the light pink accents inside the flower, as well as the leaves.
6. I repeated the previous steps to the rest of my nails, making small light pink flowers and accenting them with the darker pink.
7. To prevent smearing, I gave my nails about 10 minutes of dry time before applying my top coat.

IMG_4873

Hope you enjoyed this look! I had a lot of fun doing it!

signature

Tuesday, June 17, 2014

My Most Used Makeup Brushes and Tools- Face Edition + $5 off coupon for Sigma!

allbrushes

Truth be told, I have a lot of makeup brushes. I could easily admit that I have way more than I would ever need. This may or may not look like a lot of brushes to you, but I really enjoy and use them frequently. These are the tools I use the most out of my collection. I don’t use each one every single time I apply makeup, but I find that no matter what other methods of application I try, I always go back to these. If you’re interested in checking any of the brushes out, be sure to click the name! I’ve also included a link at the end of the post that will get you $5 off if you want to try out any Sigma brushes or products!

BB

Beauty Blender- If I had to throw all of my other tools away and only choose one, I’d choose the Beauty Blender every time. I have incredibly dry skin, so I’m always struggling to get my foundation to look smooth and even. It’s a constant struggle. I’ve found that even with daily exfoliation, the more I buff foundation into my skin, the cakier it can appear. Add concealer and powder to set it, and it looks ridiculous. The BB prevents all of that. It gives me a smooth, airbrushed-like finish and nothing ever appears cakey. I use this for both concealer and foundation. (Excuse the foundation stains on my Beauty Blender. It's well-loved!)

188

MAC 188- The tiny duo fibre brush is one of my multipurpose brushes. I use it to blend out under-eye concealer, applying powder to my under-eye area, and even applying foundation when I wanted a fuller coverage. It’s not very heavy or dense, so it’s still great for my skin type.

bsb

Real Techniques Base Shadow Brush- This brush is intended for applying eye shadow, but I use it for concealing blemishes. It’s tapered, so the point of it is great for gently applying product onto the blemish and virtually erasing it.

F50

Sigma F50 Duo Fibre Brush- I love to use this as my powder brush. It lightly sets my foundation without applying too much powder.

SB

Real Techniques Stippling Brush- I use this brush to apply and blend a liquid or powder highlight.

F40

Sigma F40 Large Angled Contour Brush-I love this brush for contouring with powder bronzer and applying blush. It’s the perfect shape for contouring in the hollows of your cheeks.

allbrushes2

As you can see, I love Sigma Brushes. If you're interested in purchasing a set or any individual brushes, you can save $5 on your order by clicking here!


signature

Saturday, June 14, 2014

Simple Gradient/Summer Mani!

I’m so excited to show my very first nail art design! Well, I can hardly call it art. And it certainly isn’t a design. This look is actually pretty darn simple. All you need is the polish of your choice, a makeup sponge, and some tape! Can’t beat that.

I like this look because it’s simple, but makes a statement. Of course, you can recreate this with ANY colors you want, from any brand. Get creative!

14233008908_58dc3eec24_z (2)

Here are the products I used!
14419604735_5c51ed8c42_o

1. Seche Vite Dry Fast Top Coat (My holy grail)
2. Orly Beach Cruiser
3. Julep Brigitte
4. Scotch tape (I used the cheap stuff. You can also use painters tape or washi tape!)
5. Rock Hard Nail Hardener Base Coat
6. Julep Flora (One of my favorite purples of all time!)
7. A non-latex sponge (Non-latex allows the polish to absorb into the sponge for better blending)

Here are the steps to recreate the look, as well as a close up.

1. I started with a blank canvas of white nails. This allowed for a brighter pop of color and a bit more contrast between the bright colors and the white.
2. I polished my ring and index fingers.
3. After the white polish had COMPLETELY dried, I painted stripes onto my sponge and began stippling it onto my thumbnail. (The key to an opaque finish is thin layers. Continue applying polish to the sponge and then to your nail until you get the desired look.)
4. I saved my middle finger for last. I used the corners of my nail for a guideline, and applied the tape to create a “V” shape. I repeated the same sponge technique as the previous step until it was the desired brightness.
5. Seal everything with a fast drying top coat!

14418315552_bfdec365bf_z (2)


I will admit, it’s not the cleanest manicure I’ve ever done, but I still like it. Hope you enjoyed this look!


signature

If you haven't already, be sure to "Like" Pups and Polish on Facebook by clicking here. It's the best way to keep up with new posts and giveaways!

Tuesday, June 3, 2014

Julep Swatches (June 2014)

Hey y’all! Before I get to swatching, I have to say a HUGE thank you to everyone that has taken time to check out my blog. I know it’s still in the very early stages, so to break over 200 views on my first day was completely unexpected. Thanks to everyone that shared my page, followed it on Blog Lovin’, and supports it in any way. Love you guys!

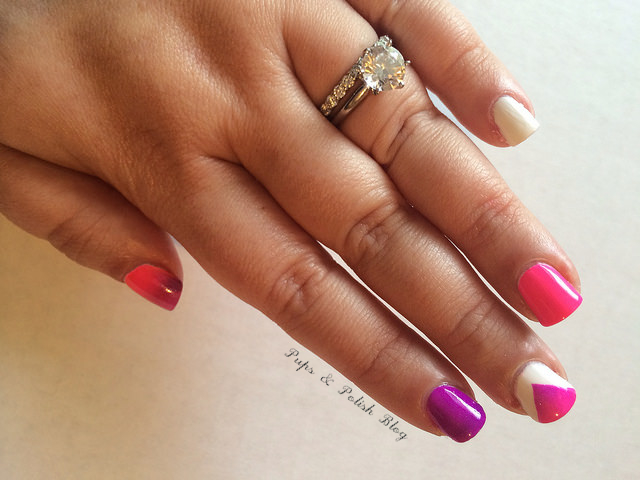
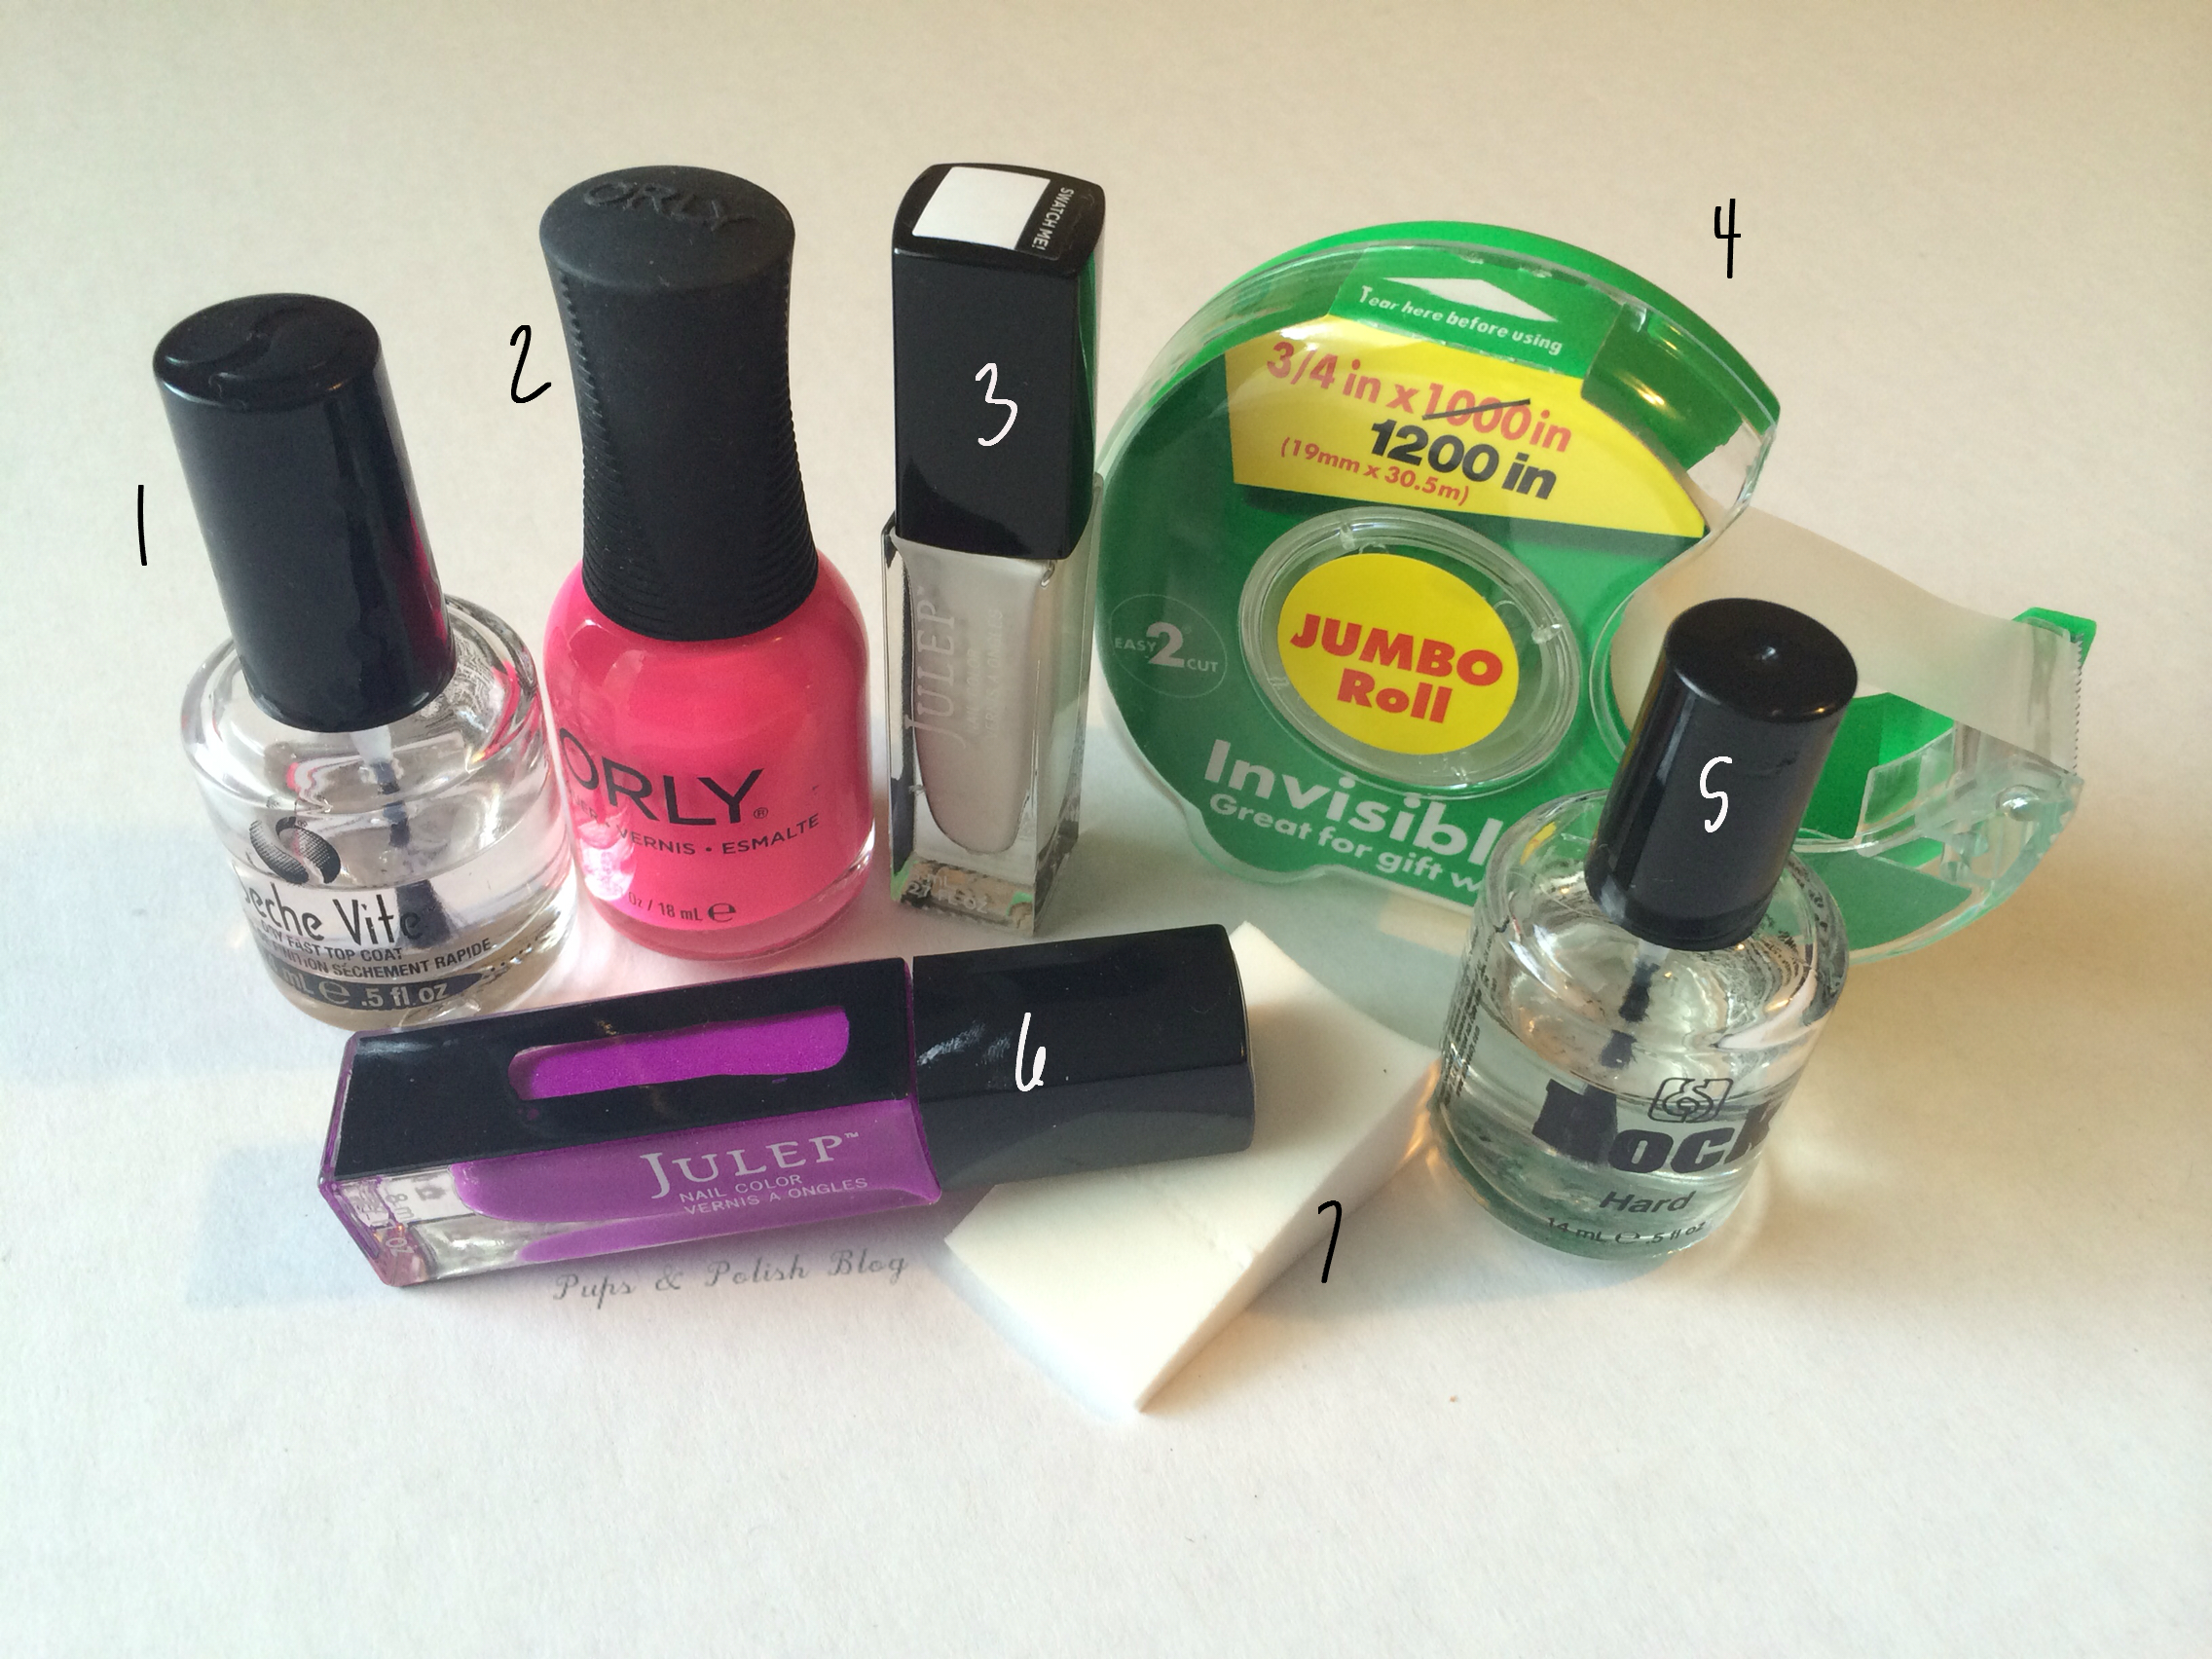
Time for some swatches! For some odd reason, I love swatching nail polishes. It’s a weird, cathartic hobby of mine. As I mentioned in my last post, I only loved one color out of the entire “Three Wishes” Collection. Although the colors were pretty, but I couldn’t help but see lots of purple and LOTS of shimmer. (Shimmer just isn’t my thing.) After going through each color, I knew Bergen was the only color I really had to have.

image

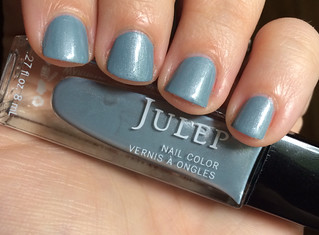
It has a shimmer finish, but it’s much more subtle than I thought it would be. The color is definitely darker than what Julep depicted on their site, but I still enjoy it. I pictured it as a pale gray-blue, but it has much more blue than gray. It’s a calming, quiet shade. The formula was perfect to work with. Not too thick, not too thin.

Overall verdict: I like it! With the cool, calming tones, I would almost classify this as a neutral (and I love me some neutrals).

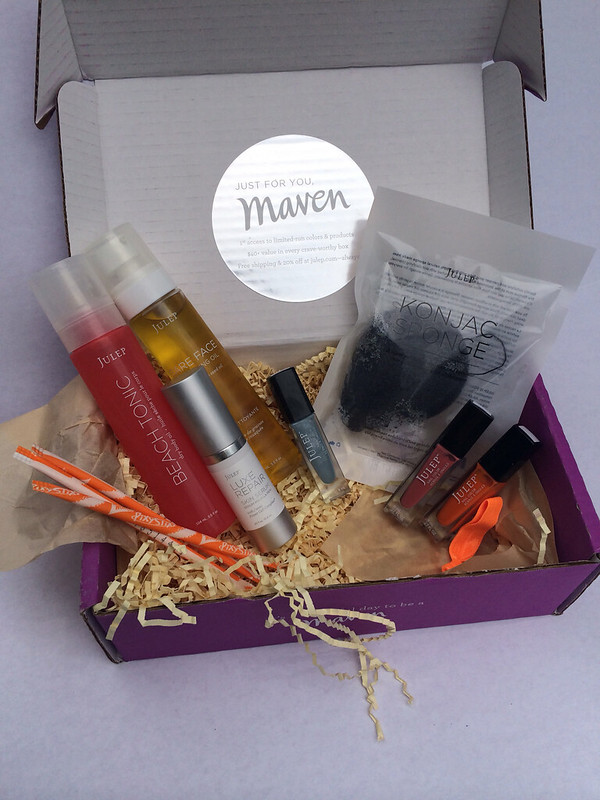
Next we have Majorie. I have to preface this swatch by saying that I really do not like the color orange. It’s my LEAST favorite color. Maybe I have hostility towards it because it’s really the only color I cannot wear. (Lots of yellow undertones in my skin + orange = Oompa Loompa status.) I would have never purchased this color for myself, but because it came as a free gift for choosing three add-ons to my box, it was out of my hands. I have to admit, I was kind of bummed when I opened the box and saw it. But, fair is fair. I decided to give it a shot.

image

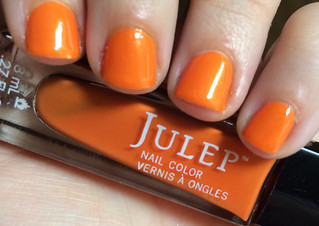
Like Bergen, it has a very slight shimmer. It’s definitely a bright, fun, summery orange. The website describes it as a sheer finish, but I found that it was completely opaque after two coats.

Overall verdict: It’s okay (for me). I would recommend this color to others in a heartbeat. It’s just not my personal favorite based on my skin tone and preference. The formula is great to work with, and although I don’t see myself reaching for it for a complete manicure, it’s good to have around for nail art.

Last but not least, we have Veronica. Finally a crème formula! I LOVE the crème formulas that Julep offers. It’s a nice, mauve pink and it’s completely opaque after one coat. (You can’t beat one-coaters.) It’s obviously a thicker formula than the sheers, but still incredibly easy to work with. Like Majorie, I’m not sure if I would have picked this color myself. I tend to stick with pale pinks because they’re so neutral. However, I’m really happy they chose this color to give away. It’s very feminine, without being over the top.

image

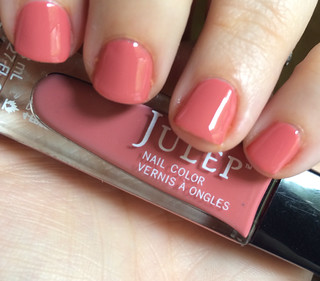
Overall verdict: Love it. I can see myself reaching for this color quite a bit. I love that it’s a deeper, more wearable pink. I think it’s great for all ages and skin tones.


signature

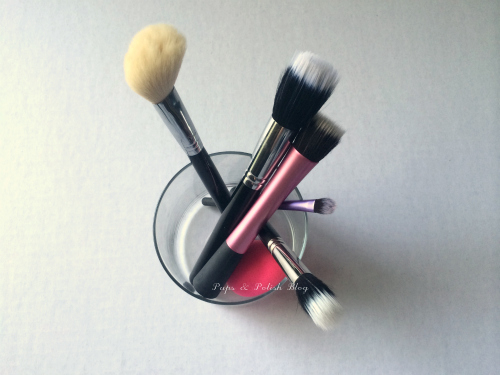
*Thanks for being patient with me as I continue to improve upon these posts. Please excuse picture quality, lighting, and/or typos. It’s still a learning curve and will improve with time!

Sunday, June 1, 2014

Julep Maven June 2014 Unboxing

It’s here! The moment I’ve been waiting for. Some of you may know my obsession with Julep. Others might not. I’ve been a Julep Maven for 4 months now, and I have to say, this month is by far the best.

So far, I’ve been content with the boxes. I haven’t been in love with them, but I haven’t hated them either. The formulas used in the polishes are great, but the colors in each collection leave a lot to be desired. Call me crazy, but the recent collections are a little too sparkly and pastel for my taste. This month was no different.

I decided to branch out and try the “Core Classics” box. I’ve been bored with my skin care lately, and I’ve read rave reviews on the Bare Face Cleansing Oil. This was the best choice I could have possibly made. Not only did I get double Jules (reward points) for selecting that particular box this month, but I also used the Jules I already had to essentially pay for my add-ons!

For my add-ons I selected the color Bergen (aka the ONLY color I liked in this month’s entire collection), a pack of two Konjac Cleansing Sponges, and the Luxe Repair Skin Serum. As a gift for selecting 3 add-ons, I got two additional polishes for free. The total for everything was just over $51, but because I used my Jules, I only paid $25. Score!

image


I can't wait to test my new goodies out! Stay tuned for reviews and swatches!


signature

Welcome, Welcome!

Thanks for stopping by! My name is Lindsey Tharp. I'm a 25 year old beauty product junkie and I'm so excited to share my addiction with you! Just to start this thing off, let's get to know each other a little, shall we?

I found a love for makeup and nail polish about 6 years ago. I began watching YouTube videos just as the beauty community was forming and I’ve been hooked since then!

I started this blog as a way to share nail art designs, product reviews, and tutorials with whoever may be interested. (I can only “teach” my husband the importance of exfoliation so many times before his eyes glaze over.)The name Pups and Polish represents what the content of my blog is made of; my personal and family life, as well as all things polish and beauty product related. Consider this a beauty blog, with a little bit of a personal touch thrown in.

Before we get started, you should know that this blog has a schedule! You’ll see posts from me 3-5 days a week. The posts will include nail art, polish swatches, reviews of polishes and beauty products alike, tutorials, and a personal post here and there. I’m so excited to start blogging! It’s been a goal of mine for quite some time. Thanks for being a part of it!


signature